How To Convert HTTP To HTTPS On Blogger With Custom Domain
Putting up a blog or website requires a lot of work and settings, some of which might seem minor to an ordinary blogger but have a huge impact on the effectiveness of the blog. One such setting is converting your protocol from HTTP to HTTPS.
The only way to accomplish this is to buy an SSL certificate and install it on your hosting environment. SSL certificate doesn't come free. You'll have to pay for it depending on your web hosting company, as some of them might choose to give you a free offer after you purchase a hosting plan with them.
Right here I will be unveiling to blogger users how to convert HTTP to HTTPS for free without paying for an SSL certificate. But before that, let's consider some certain terms you should probably know.
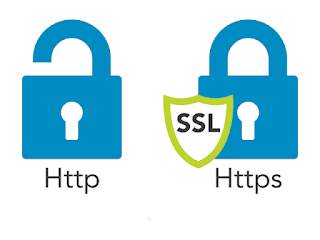
- HTTP (hypertext transfer protocol) is a medium that provides a connection between users and servers by sending HTML data to the users' browser. When HTTP was introduced in the early 1990's, the need for a more secure and reliable protocol led to the release of HTTPS. Websites using the http protocol often start their urls with http:// and don't forget that http://www.****.com is the same thing as www.****.com
- HTTPS: Hypertext Transfer Protocol Secure, as many will call it, is an encrypted version of HTTP. Both protocols offer the same functions except for the fact that the HTTPS SSL protocol ensures the safety of website visitors.
- SSL Certificates: A Secure Socket Layer certificate is a digital certificate that enables an encrypted connection between users and servers. It also authenticates a website's identity. SSL certificates are a must for organizations and companies for them to secure online transportation.
Having known all this, let's get started on how to setup the conversion from HTTP to HTTPS on Blogger
- First, log in to your Blogger dashboard and ensure you're logged in to the blog you want to convert its protocol to.
- Click on the menu button on the top left corner and watch out for the drop-down options.
- Click on Settings and a new page will pop up with a lot of options to pick from.
- Scroll down to "HTTPS
- Enable HTTPS availability by clicking on the button on the right corner.
- Enable HTTP redirect as well
- Your settings will be saved automatically, and also note that your site won't be accessible within 10–20 minutes after the set has been done.
- Refresh your site to check if it's back online. If so, check your URL to see if it has been changed from http:// to https://.
- After the settings have been done, copy your home page url and submit it to the Google search console for your blog to be indexed.
Reasons why you should convert to HTTPS
- Google ranks websites using an encrypted protocol and also considers such websites reliable and trustworthy.
- Most browsers also notify users who visit pages using http not to submit sensitive information on such websites. Without doubt, visitors won't be comfortable having a good time on such websites, which will definitely increase your bounce rate. Don't forget that bounce rate affects your Google keyword ranking.
The easiest way to identify a website that is encrypted (https) is by checking the URL. You will definitely find a bad lock on that bar before the URL.


.jpeg)
.jpeg)
.jpeg)
.jpeg)
